IPComms allows two types of SIP trunking when connecting to our network. Our default registration method and by far the most common, is basic SIP Registration. This method uses a SIP username and password with a registration string to connect to our SIP network. The second methog, which is less common, but useful in many scenarios, is SIP IP Authentication.
This article will cover registering your Asterisk PBX to IPComms using SIP IP Authentication.
NOTE: Be careful when editing information within your configuration files. It is best practice to perform a complete back up before modifying settings within your PBX. Any custom configurations may cause you phone system to behave differently than intended.
We'll begin by creating an outbound SIP trunk.
To place outbound calls in Asterisk systems, you will need to create an outbound trunk entry which will route outbound calls to the IPComm's SIP network and also configure how phone numbers will be delivered by configuring your dial plan settings in your extensions.conf file. This article will walk you through this process.
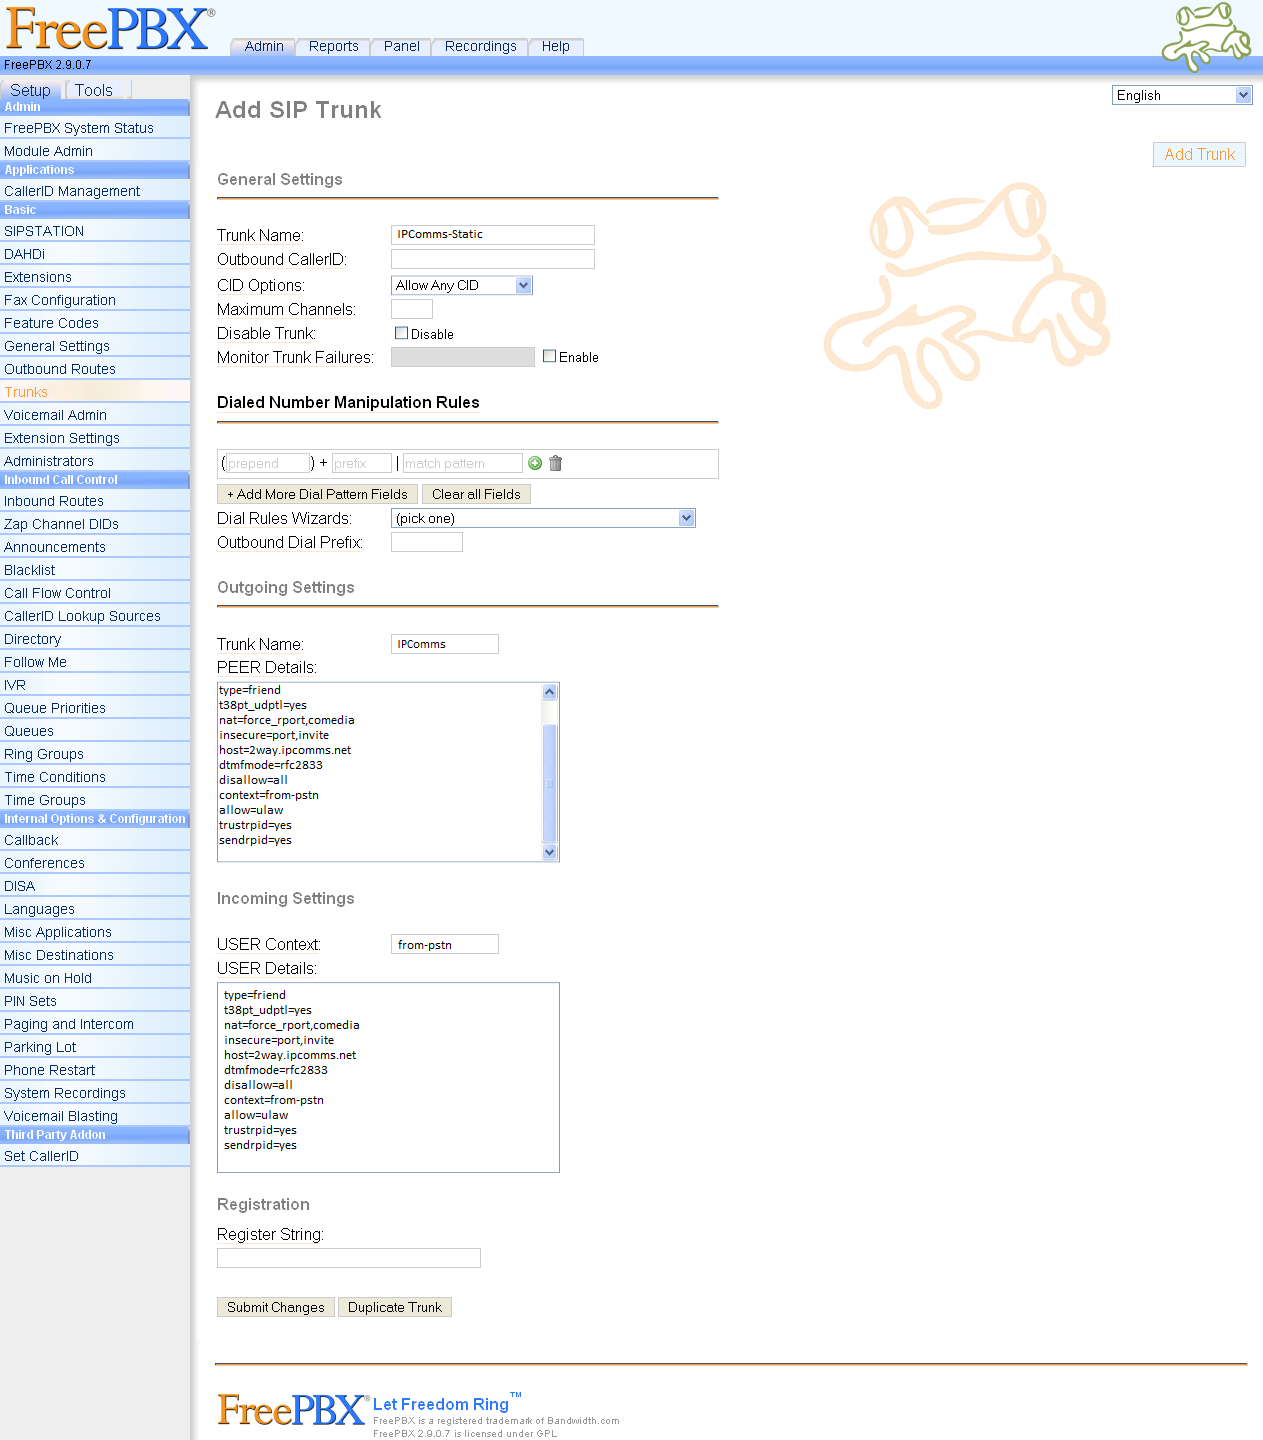
This sample configuration shows how to add and configure an outbound SIP trunk using the FreePBX front end interface. Most importantly, we will be adding entries into the Peer Details and User Details sections.
Step-by-step SIP trunk creation:
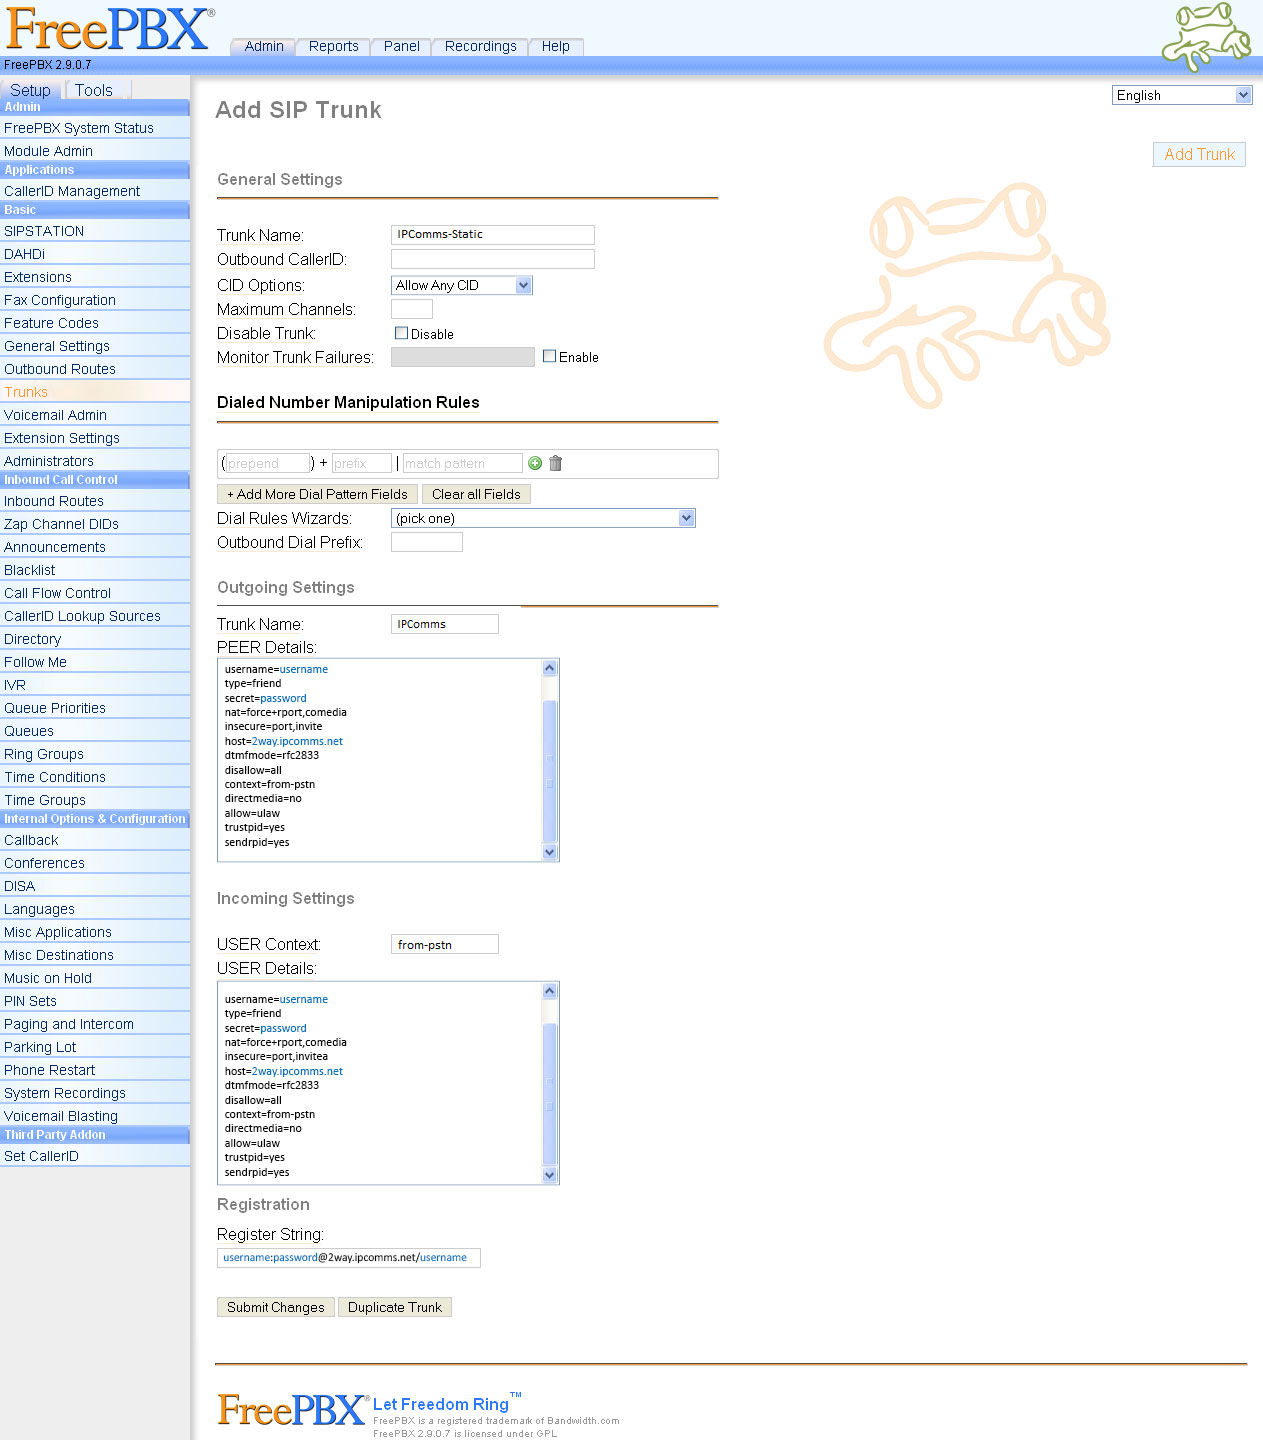
- To begin, navigate to the Trunks section of the main menu.
- From here, you will provide an arbitrary trunk name (you can make this anything you want).
- Next, you will name your trunk in the Trunk Name field. (Again, you can name this anything you want to.)
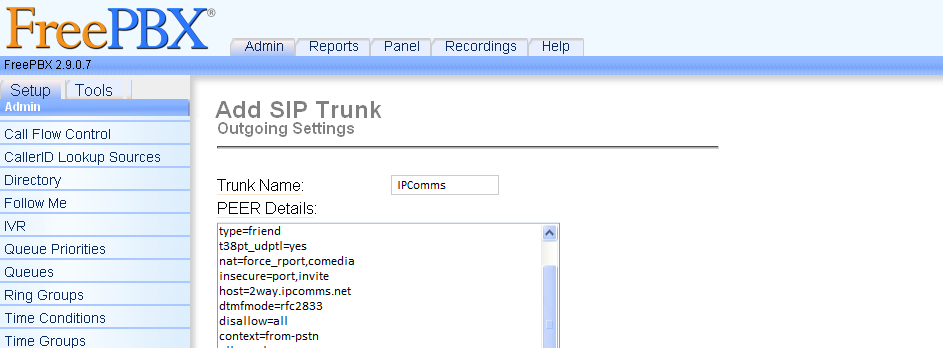
- Now, you will paste your peer details into the area given. This information should have been sent to you by IPComms in your provisioning letter. It should look similar to the sample screenshot given below.
- Next, you will paste the same information into your user details into the area given.
- There will be no registration string as this example is for IP Authentication. For SIP registration, see our SIP registration example.
- Finally click Submit Changes, and you are all set.
FreePBX Screenshot -Add SIP Trunk (click to enlarge)
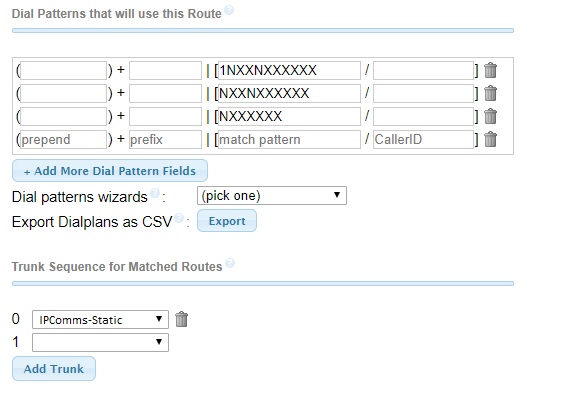
The next step is to create an outbound route in FreePBX/Asterisk PBX.
The outbound route is used to determine what numbers will be routed to the new Outbound Trunk you just created. Your specific outbound routing rules might differ, but below is an example of sending 7, 10 and 11 digit phone numbers out of the SIP trunk you just created.
In this example, we've created 3 entries
- 1NXXNXXXXXX ....(11-digit dialing)
- NXXNXXXXXX ....(10-digit dialing)
- NXXXXXX .... (7-digit dialing)
Then we'll route these calls to our IPComms-Static trunk in the Trunk Sequence for Matched Routes section of our FreePBX/Asterisk PBX outbound route page.