

This article will help you setup an IAX2 trunk in your PBX in a Flash system and connect it with IPComms SIP trunks..
- Setting up a IAX Trunk is very similar to a SIP Trunk, the biggest difference in registration is the Register String. The IAX trunk contains more information than a SIP Trunk. Trunk information can be copied over just like setting up the SIP Trunks
- Make sure to set the registration string as; username:password@domain>
- If you would like to see if trunks are registered you can go to the FreePBX System Status and look at IP Trunk Registrations.
- In the SIP Trunk make sure the contact field behind the registration string. The setup for the registration string will be username:password@domain/sipContact(username)
- After you have created your IAX Trunk you need to modify the Asterisk IAX Settings inside the Tools.
- Inside here you will be able to make changes to the Codec's, bandwidth control, and multiple other settings.
- These items will need to be checked if you have any special type of NAT setup inside the firewall or company.
- Be sure to open up Port 4569 inside your firewall, as well as ports 10,000-20,000 which are mainly for SIP, but IAX uses some of those ports
PBX in a Flash SIP Trunk Configuration & Security
Start this tutorial after you have completed PBX in a Flash Setup. After Installation, you will need to obtain your IP Address. Once the IP Address has been typed in you will be able to see PBX in a Flash with the Icons: Voicemail & Recordings, Flash Operator Panel, and MeetMe Conference for users, and FreePBX® Administration, Linux Webmin, and Menu Configuration for the Admin user.
Configuration-FreePBX®
FreePBX® is a Registered Trademark of Schmooze Com, Inc.
Before you begin
- To begin you will need to enable PBX in a Flash for Admin this is done by clicking on the Users.
- Next click the FreePBX Administration this will take you into the GUI of the PBX. The username for a first-time login is maint and the password is what you have entered earlier in the command line of setup.
- On the left-hand side, you will see a list of options.
- In order to have a softphone registered you will need to setup Trunks, and enter your PEER Details from the email of your registration email. After you have entered the credentials from the email, you can check the registered channels by going to FreePBX System Status then look under Total active channels.
- To setup your phone system to make and receive calls, setup Inbound Routes you can create anything for the Description, then use one of your numbers for the DID Number then Set Destination this will be the destination where incoming calls will be routed then select Submit.
- Next, we will setup Outbound Routes here you can setup your dialing patterns. This will allow you to make calls to destinations based on rules.
- A trunk must be setup in order to make outbound calls. If you have made any changes select Apply Configuration Changes.
- If you would like to have all extensions call out as a specific number, that can be set by checking Override Extension this is a useful feature if you want people to call back to one specific number.
- Any routes that have been created will show up on the right-hand side of the page.
- Next, we will setup a SIP Extension, to begin choose type. Next enter information that you would like to have for the desired extension.
This current build of FreePBX has a lot of fail-safe's built into the system, which may give you trouble in the initial setup but will pay off after you have more information in the system. Since we have created an extension, it is time to register the extension with a softphone. Since you have created an extension you can then route calls to that extension.
Queues can be used to help call routing.
If you would like to view more advanced setting to the Tools tab on the top of the control panel without having to go through the command line.
PBX in a Flash (Resetting the root password)
Resetting a root Password
How to reset a root password in PIAF and generic RHEL(Red Hat Enterprise Linux) based systems.
Having the ability to reset your PIAF password in-case of a lock-out is very vital when it's necessary to keep an open communication. Resetting a password may take a few minutes.
- Reboot your server
- When you see the GRUB loader quickly press a key to disrupt the normal booting process
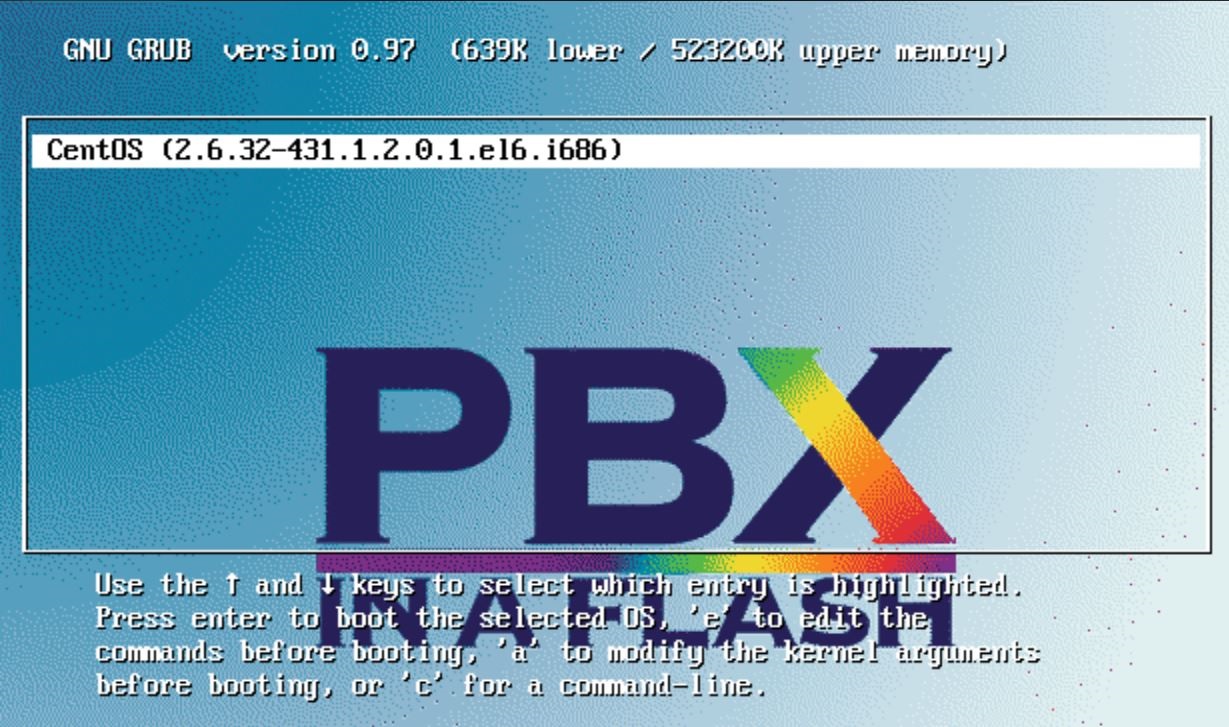
- Press the letter "e" to edit
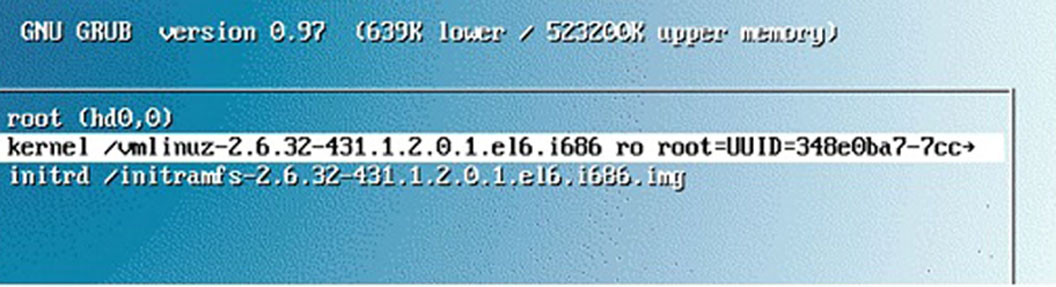
- Highlight the vmlinuz ...Kernel selection and press the "e" to edit
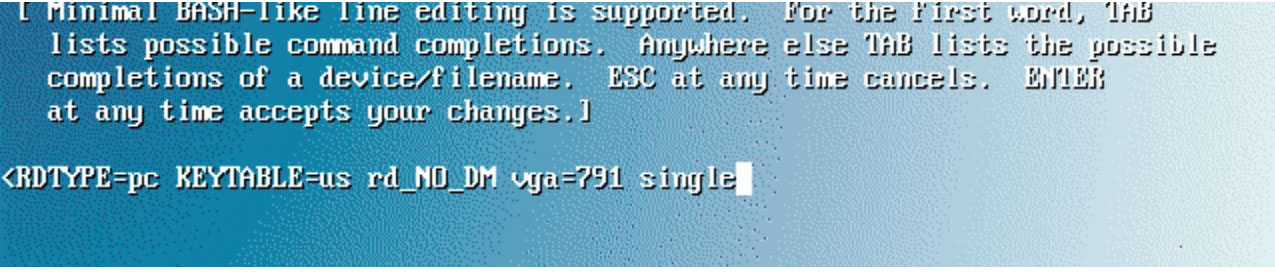
- On the end of that line, type,"single" to make the server boot in "single-user mode". Then type "b" this boot the system,and the bash prompt will appear.
- Once the kernel is booted, you should see a command prompt
- Type "passwd root" to reset your password
- Reboot as normal and log in using your new password

You can see, there are options to reset other passwords in PIAF from this menu as well.
*This should work on most RHEL-based systems
***Some devices may have SELINUX enabled or enforced, so it may not work if that is the case.
FreePBX EndPoint Manager
EndPoint Manager
EndPoint Manager is a module within FreePBX®, that can be used to install and provision IP phones as well as manage firmware updates. This is a very useful tool that works with the most of the major brands. As an example we will setup a Cisco phone, to begin select Install on Cisco. Next, you will see available models for that brand, select Enable for your current model. Next, go to the Advanced Settings and set the IP Address of the PBX, and set the directory where phones will update the firmware from.
Through the use of this module, you can optimize provisioning, and manage phones without having to physically configure the phones through each GUI interface, or creating multiple configuration files.
FreePBX® is a Registered Trademark of Schmooze Com, Inc.
Setting up your IAX Trunk inside PBX in a Flash/FreePBX
Setting up your IAX Trunk inside PBX in a Flash
- Setting up a IAX Trunk is very similar to a SIP Trunk, the biggest difference in registration is the Register String. The IAX trunk contains more information than a SIP Trunk. Trunk information can be copied over just like setting up the SIP Trunks
- Make sure to set the registration string as; username:password@domain
- If you would like to see if trunks are registered you can go to the FreePBX System Status and look at IP Trunk Registrations.
- In the SIP Trunk make sure the contact field behind the registration string. The setup for the registration string will be username:password@domain/sipContact(username)
- After you have created your IAX Trunk you need to modify the Asterisk IAX Settings inside the Tools.
- Inside here you will be able to make changes to the Codec's, bandwidth control, and multiple other settings.
- These items will need to be checked if you have any special type of NAT setup inside the firewall or company.
- Be sure to open up Port 4569 inside your firewall, as well as ports 10,000-20,000 which are mainly for SIP, but IAX uses some of those ports
Trunk Configuration with PBX in a Flash
Today we will be configuring a Trunk for service with IPComms, to begin we simply copy and paste the information from your registration.
- After entering your Trunk Configuration information, click Save Changes.
- To check any information you have entered simply go to FreePBX System Status, from here you will be able to see any IP Phones and IP Trunks that are online, as well as some other information about your PBX.
- Next we setup an Inbound Route this will benefit you if you have multiple numbers, to avoid confusion and slower system speeds talk to IPComms about getting your numbers mapped to your current trunk. Having too many routes setup, or using out of date software could bog down your system.
- Next, we will setup the Outbound Routes, this current route is setup to take calls from any number that starts with a US prefix. Here you will also have the option to setup your route to automatically dial the 1, instead of doing it each call. International Routes may also be setup for different trunks.
- If you are having audio issues after setting up your routes you should change your NAT Settings. This is done by going to Asterisk SIP Settings in the Tools tab, and enter your IP Address in the External IP location and the Local Networks so they will automatically mask your IP Address.
